


Gone are the days of mundane shaving rituals and waxing woes. If you’ve ever dreamed of saying goodbye to stubborn stubble and relentless regrowth, welcome to the dazzling world of DIY laser hair removal! But, as with any beauty innovation, it’s not all smooth sailing. Will you achieve gloriously hair-free skin without stepping outside your front door, or end up in a prickly predicament? In “Zap or Trap? The Ups and Downs of DIY Laser Hair Removal,” we’ll uncover the magic, mishaps, and must-knows of taking laser treatments into your own hands. So, grab your goggles and a cozy spot—we’re about to shed some light on this revolutionary beauty trend!
Table of Contents
- Understanding the Laser: How It Really Works
- Safety First: Prepping Your Skin for Laser Treatment
- The Pain Factor: What to Expect During and After
- Choosing the Right Device: Features to Look For
- Aftercare Essentials: Keep Your Skin Happy and Healthy
- Q&A
- Concluding Remarks


Understanding the Laser: How It Really Works
A laser is a marvel of modern technology. The word **LASER** stands for Light Amplification by Stimulated Emission of Radiation. It operates by emitting concentrated light beams, honing in on specific targets—in this case, hair follicles. Inside a laser device, energy gets ramped up until it reaches a high-intensity level. When directed at the skin, the laser’s light energy is absorbed by the melanin in the hair, transforming into heat and damaging the hair follicle, thereby reducing or halting hair growth.
It’s fascinating to see how such a precise tool can be gentle yet effective. DIY devices utilize lower energy settings compared to professional lasers found in clinics, which means the process is typically slower and less intense. Here’s what happens inside that sleek, hand-held gadget:
- **Energy Source**: Powers the device, usually a rechargeable battery.
- **Diode Laser or IPL**: Emits the light needed for hair reduction.
- **Cooling Mechanism**: Keeps the surface of your skin comfortable.
Let’s break down a few key features commonly found in DIY laser hair removal tools:
| Feature | Purpose |
|---|---|
| Intensity Settings | Adjustable for different skin sensitivities |
| Pulse Rate | Dictates the number of beams per second |
| Skin Tone Sensors | Ensures safe use based on skin color |
As innovative and appealing as these devices are, they aren’t a one-size-fits-all solution. People with dark skin or very light hair may not get optimal results, since the laser targets melanin. It’s crucial to read user manuals thoroughly and perhaps even perform a patch test. Skin reactions can vary, so understanding both the mechanics and limitations can save you from disappointment and potential discomfort. Clip out that unwanted hair with caution, but remember, every zap brings you one step closer to sleek, smooth skin right at home!
Safety First: Prepping Your Skin for Laser Treatment
Before you dive into the world of DIY laser hair removal, it’s crucial to prepare your skin properly. Think of it as prepping a gourmet meal; a little effort before can lead to fabulous results. First off, **cleanse your skin thoroughly**. Dirt, oil, and makeup residues can interfere with the laser’s efficacy, and you don’t want anything to come between you and smooth, stubble-free skin. Use a gentle cleanser—your skin should be soft and squeaky clean.
**Exfoliation** is the next big step. Buffing away dead skin cells ensures the laser reaches the root of the hair follicle without any barriers. However, opt for a mild exfoliation. Overdoing it might irritate the skin, rendering it too sensitive for treatment. Along these lines, steer clear of **harsh chemicals and retinoids** in your skincare regimen at least two days before your laser session. These can make your skin more susceptible to discomfort and damage.
Lastly, remember that **hair length matters**. Your mane does need a bit of length for the laser to be effective, but not too long. A quick trim or a shave the day before your session is ideal. On treatment day, avoid perfumes, deodorants, and lotions that can complicate the process. You want your skin to be like a blank canvas for the laser to work its magic.
| Step | Action |
|---|---|
| Cleanse | Use a gentle cleanser to remove dirt and makeup |
| Exfoliate | Gently exfoliate to remove dead skin cells |
| Trim/Shave | Trim or shave hair to an optimal length |
| Avoid Chemicals | Steer clear of harsh chemicals and retinoids |
To wrap things up, performing a **patch test** is always a wise move. This step is often overlooked but crucial to discerning how your skin will react to the laser. Test a small, inconspicuous area at least 24 hours before your full treatment. If no adverse reactions occur, you’re in the clear. If you experience redness, itching, or swelling, it might be best to reconsider or consult a professional. Better safe than sorry!


The Pain Factor: What to Expect During and After
When embarking on the journey of DIY laser hair removal, one of the first questions on everyone’s mind is about the pain factor. Let’s get real—there’s no sugarcoating it, you will feel something. The magnitude of discomfort can vary significantly depending on your *pain threshold, hair thickness, and the area’s sensitivity*. A lot of users describe the sensation as similar to a rubber band snapping against the skin, which might sound intimidating at first but becomes quite manageable with practice.
- **Skin Sensitivity**: Areas like the bikini line and underarms can be more sensitive.
- **Hair Thickness**: Thicker hair tends to cause more discomfort.
- **Device Settings**: Higher settings may offer better results but can be more painful.
- **Individual Pain Threshold**: Everyone’s tolerance can differ.
Immediately after a session, expect some redness and swelling. This is completely normal and usually subsides within a few hours. To ease any irritation, applying a soothing aloe vera gel or a cooling lotion can work wonders. Avoid hot showers, saunas, and sun exposure for at least 24 hours; your skin is more vulnerable and needs time to heal. Think of it as rewarding yourself with some pampering and self-care time.
If you’re someone who loves data, here’s a quick look at the comfort levels you might experience across different body areas:
| Body Area | Comfort Level | Pain Tips |
|---|---|---|
| Forearms | High | Start with lower settings |
| Legs | Moderate | Proceed gradually |
| Bikini Line | Low | Consider numbing cream |
Listen to your body and adjust settings as needed. Over time, as your hair becomes finer and sparser, you’ll likely find that the process becomes not just more bearable, but perhaps even something you look forward to as part of your beauty routine. The key to success is consistency, patience, and a touch of bravery to overcome the initial “zap” and embrace the smoother days ahead.


Choosing the Right Device: Features to Look For
When diving into the world of DIY laser hair removal, selecting the right device is your first and most crucial step. The tech market is saturated with an array of options, each boasting its unique blend of features, benefits, and sometimes, a few quirks. Let’s help you find a device that will make your hair removal journey smooth, effective, and most importantly, safe.
Power and Adjustability:
- Energy Levels: Opt for a device that offers multiple energy levels. This allows you to tailor the treatment intensity based on your comfort and skin sensitivity.
- Pain Management: Some devices include built-in cooling mechanisms or skin sensors that make the zapping experience more comfortable.
| Feature | Benefit |
|---|---|
| Multiple Energy Levels | Customizable intensity for different skin types |
| Cooling Mechanisms | Enhanced comfort during use |
Usability and Design:
- Ergonomics: Look for a device that fits comfortably in your hand. An awkward, heavy gadget can make the process more cumbersome than it needs to be.
- Ease of Use: User-friendly interfaces with clear instructions can make all the difference for beginners. Consider devices with intuitive controls and informative display screens.
Safety and Skin Compatibility:
- Skin Tone Sensors: Some advanced models feature automatic skin tone sensors, which ensure that the device only operates on skin tones it’s safe for.
- FDA Approval: For peace of mind, choose devices that are FDA-approved. This certification indicates that the device has met stringent safety standards.
Extra Features:
- Battery Life: Check whether the device is battery-operated or corded. A long-lasting battery can offer more convenience, especially for full-body treatments.
- Portability: If you travel frequently, you might want a compact, travel-friendly design that comes with a protective case for safe transportation.
With these tips in mind, you’ll be well-equipped to zap away unwanted hair with confidence and ease.

Aftercare Essentials: Keep Your Skin Happy and Healthy
Once you’ve braved the beam of your DIY laser hair removal kit, give your skin the TLC it craves with these **aftercare essentials**. First and foremost, hydration is key. Think of your skin as a thirsty sponge ready to soak up all the moisture it can. Opt for soothing moisturizers with ingredients like aloe vera, hyaluronic acid, and chamomile. These will not only hydrate but also calm any redness or irritation lurking on the surface.
Swapping your usual skincare products for ones designed for sensitive skin might be a smart move. Look for gentle cleansers free of sulfates and alcohol, and steer clear of exfoliants and retinoids for a few days following your session. Here are a few friendly suggestions:
- Gentle Cleanser: Non-foaming, fragrance-free options
- Moisturizer: Lightweight with calming ingredients
- Sunscreen: Broad-spectrum SPF 30 or higher
Speaking of sunscreen, it’s your new best friend! UV exposure can worsen any post-laser inflammation and lead to unwanted pigmentation. Wearing a broad-spectrum SPF 30 or higher not only protects your skin but also aids in the healing process. Remember, reapplication is just as important, so take that little bottle with you wherever you go.
Keeping your clothing choices loose and breathable helps to prevent further irritation. Tight clothes can rub against your treated skin and cause discomfort. Aim for natural fabrics like cotton for ultimate comfort. Need a quick reminder? Check out this handy table:
| Product | Benefits |
|---|---|
| Loose Cotton Clothing | Prevents irritation and allows the skin to breathe |
| Aloe Vera Gel | Soothes and hydrates |
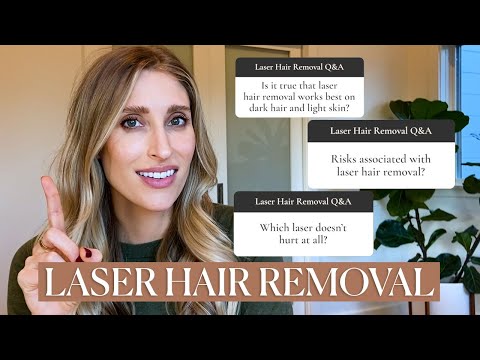
Q&A
Q&A: Navigating the World of DIY Laser Hair Removal
Q: What’s the buzz around DIY laser hair removal?
A: Oh, it’s all the rage! Imagine a world where you can zap away unwanted hair while binge-watching your favorite shows. DIY laser hair removal promises just that—smooth, hair-free skin from the comfort of your couch. No need to schedule pricey salon appointments or endure the awkward small talk. Sounds dreamy, right?
Q: Is it really that effective?
A: Great question! DIY laser hair removal devices have come a long way. Many use IPL (Intense Pulsed Light) technology, which is similar to what you’d find in professional settings. However, effectiveness can vary. The results often depend on factors like hair color, skin tone, and the device itself. Some users report significant hair reduction, while others need a bit more patience and persistence.
Q: Are there any risks I should worry about?
A: Absolutely, safety first! While DIY devices are generally user-friendly, they’re still lasers—we’re talking about beams of light aimed at your skin. Risks include burns, blisters, pigmentation changes, and eye injuries if not used properly. It’s crucial to follow instructions meticulously and perform patch tests. If you have any skin conditions or doubts, a chat with a dermatologist wouldn’t hurt.
Q: How does one choose the right device?
A: Ah, the million-dollar question! With endless options on the market, picking the right one can be daunting. Look for devices with good reviews, FDA approval, and user-friendly features. Many gadgets come with multiple intensity settings and skin tone sensors to ensure safer use. Start by assessing your own hair and skin type—devices are typically more effective on darker hair and lighter skin.
Q: What’s the prep work before zapping?
A: Think of it like getting ready for a big day out—you want to do it right. Clean and shave the area you’re treating (no waxing or plucking, as the laser needs the hair root). Make sure your skin is dry and free from lotions or deodorants. Some devices recommend avoiding sun exposure before and after treatment, so think SPF!
Q: How long till I see silky-smooth results?
A: Patience is key, my friend. Laser hair removal is not a one-and-done kind of deal. Most devices recommend treatments once a week for about 3-4 months. You’ll start seeing a reduction in hair growth after a few sessions, but full results might take a bit longer. Once you reach your desired look, occasional touch-ups will help maintain that smooth finish.
Q: Any common pitfalls to avoid?
A: Great point! Consistency is crucial. Skipping sessions or overestimating the power of a single treatment can lead to lackluster results. Another pitfall is overusing the device, which can irritate the skin. Trust the process, follow the schedule, and avoid the temptation to use it more frequently than recommended.
Q: Is it worth the hype?
A: Ultimately, it comes down to personal preference. If you’re looking for convenience and are willing to invest the time and money, DIY laser hair removal can be incredibly rewarding. However, it’s not a magic wand—it requires diligence and proper use. For those who prefer professional treatments, the expertise and oversight might be a safer bet. Consider your options, test the waters, and choose what fits your lifestyle best. Happy zapping!
Q: Any final tips for newbies?
A: Dive in with an open mind and realistic expectations. Research thoroughly, read user reviews, and don’t hesitate to consult experts if needed. Remember, patience, consistency, and care are your best allies in the quest for smooth, hair-free skin. Enjoy the process and keep it safe!
And there you have it—everything you need to make an informed decision about DIY laser hair removal. Ready, set, zap! 🚀
Concluding Remarks
As the final laser light fades and the lingering buzz of DIY hair removal fades into your memory, it’s clear that the journey of “Zap or Trap?” is far from black and white. We’ve illuminated the pathways, both smooth and stubbly, showing you the potential for silky results alongside the reality of a few potential pitfalls.
Whether you’ve become a DIY evangelist or have decided the pros and cons lead you back to the professional’s chair, remember that your skin’s story is uniquely yours to craft. So, should you choose to take the laser into your own hands, may your pulses be precise and your patience plentiful. And as you stand at the crossroads of zap or trap, remember every glowing review or cautionary tale we’ve explored here—because enjoying smooth, radiant skin is about more than just hair; it’s about feeling confident and empowered in your own skin. Happy zapping!


